Flexible Wire Machining Cylinder Block And Cylinder Head
| The CNC special fixture solution of the flexible production line is the basis for achieving efficient machining. Let’s start with the key structural design of multi-variety engine block and cylinder head fixtures produced on the same line, and discuss the key design of fixture layout schemes to improve the efficiency and quality of production lines. |
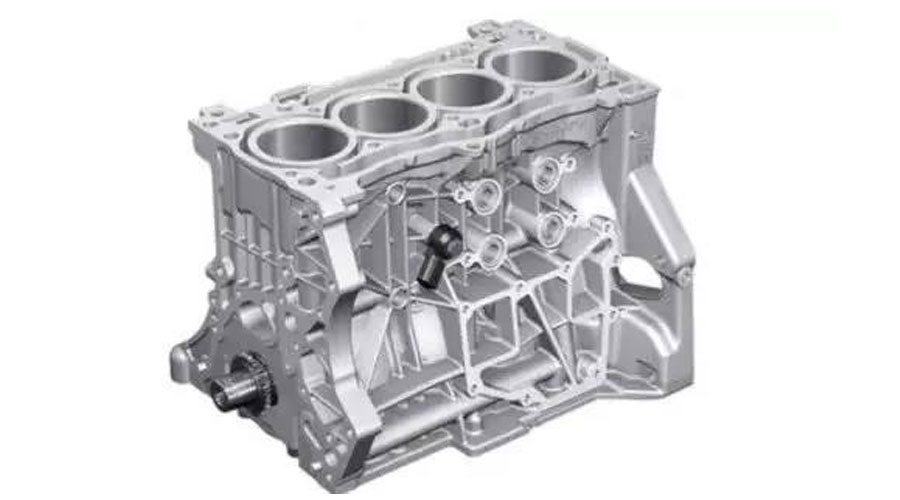
Part.1 Efficient Fixture Design For Roughing
The roughing process completes the subsequent process positioning reference machining; the main machining surface is removed, while a reasonable margin is reserved for finishing to ensure the final size, flatness, and surface roughness of the machining surface. Under the same process conditions of multiple product rough benchmarks, the key considerations are machining interference, cutting efficiency and machining quality stability. When the rough benchmarks of the products are different, it is necessary to achieve compatibility through the innovative design of the fixture.
[1] cylinder block clamping scheme
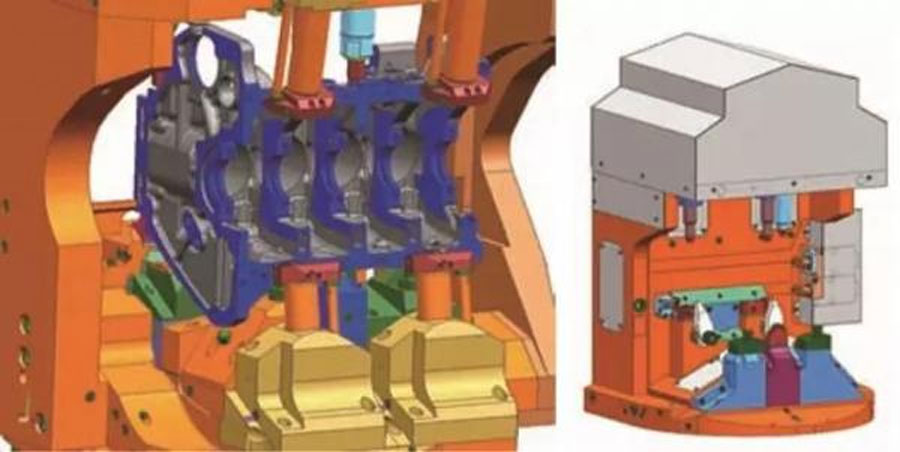
As shown in Figure 1, rough machining is mainly feature machining such as cylinder block and combustion chamber surface. After the workpiece is seated, the clamp mainly pushes the rod through the oil cylinder to press the sand removal hole of the cylinder body to accurately press the part in the reference direction, but the rod is compressed due to the casting margin, draft angle and cutting impact load. Frequent fractures seriously affect production efficiency.

However, the clamping head at the other positioning point in this direction has never experienced a fracture problem. By rationally redesigning the indenter structure, as shown in Figure 2, this auxiliary clamping scheme is designed to the same structure, which effectively solves the indenter The problem of fracture due to impact.
[2] Dual fixture solution adapts to co-line production
The rough positioning benchmarks of the cylinder heads are quite different, and three solutions are proposed for the production of different products in-line:
1) Outsourced to realize rough process characteristics;
2) Add a CNC;
3) Machining on the same cnc machining center.
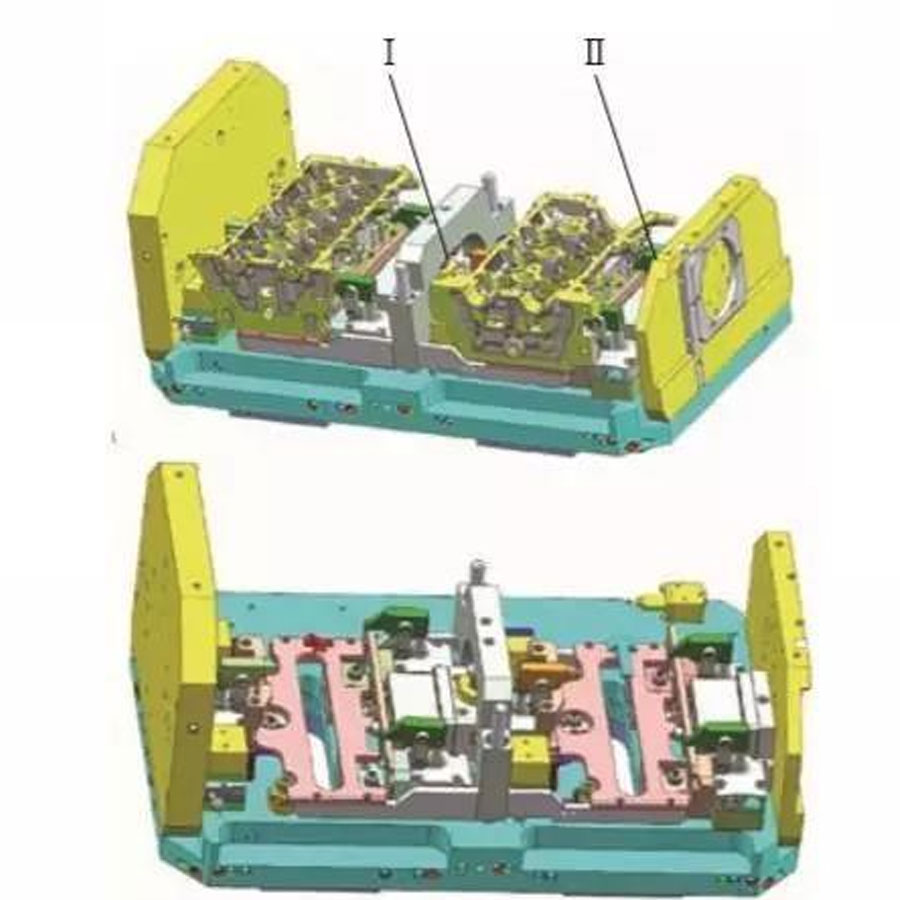
By changing the positioning device or setting the double fixture scheme, the double fixture scheme is preferred in the mass production mode after evaluation. As shown in Figure 3, the positioning design of the cylinder head parts of the large and small cylinders differs greatly: the double fixture design Ⅰ is designed for small cylinder machining; Ⅱ is the large cylinder machining position, which successfully achieves cost control and quality assurance.
Part.2 Design of Finishing Fixture Based on “One Side, Two Pins”
Cylinder block and cylinder head are typical box-type parts machining. On the basis of machining, the “one side, two pins” positioning scheme is used to achieve 6 planes and hole system finishing.
[1] Using A / B axis fixture
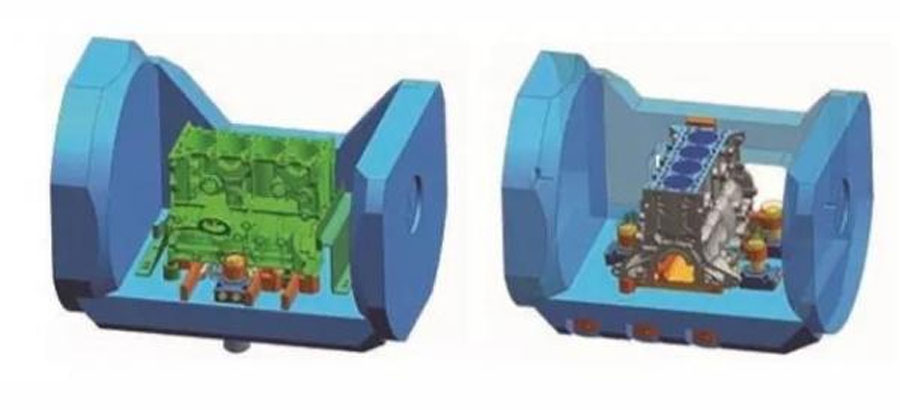
Based on the B-axis transmission method, the original cylinder block production line all adopts the B-axis fixture solution. As shown in Figure 4, some machining features such as crankshaft position sensor holes and main bearing cap joint surfaces must be turned upright to complete the machining.
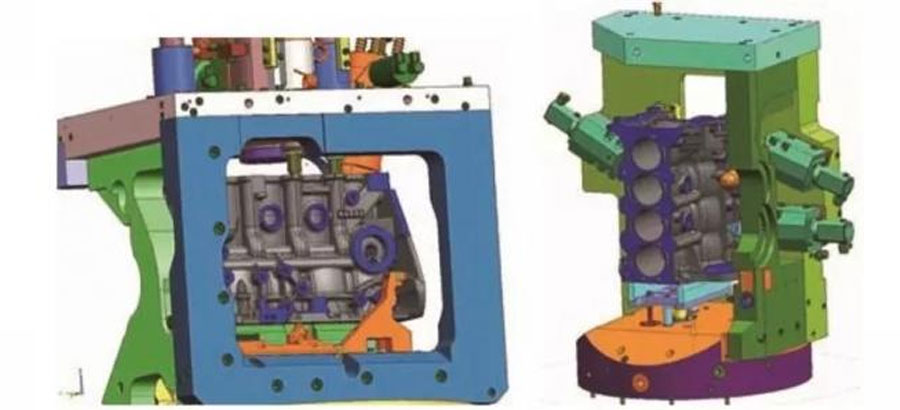
After industry inspection and practical application of the A-axis of the cylinder head, the machining load of the small-displacement cast iron cylinder block below 1.5L can fully meet the process requirements through the A-axis machining. As shown in Figure 6, using the B-axis and A-axis tandem arrangement can conveniently realize that the positioning surface of the part always faces downwards, without the need to turn it upright. It not only saves the operating time of employees, reduces the workload, but also avoids Cutting fluid splashing during turning causes pollution to the working environment.
[2] Optimize the clamping point design of aluminum alloy fixture
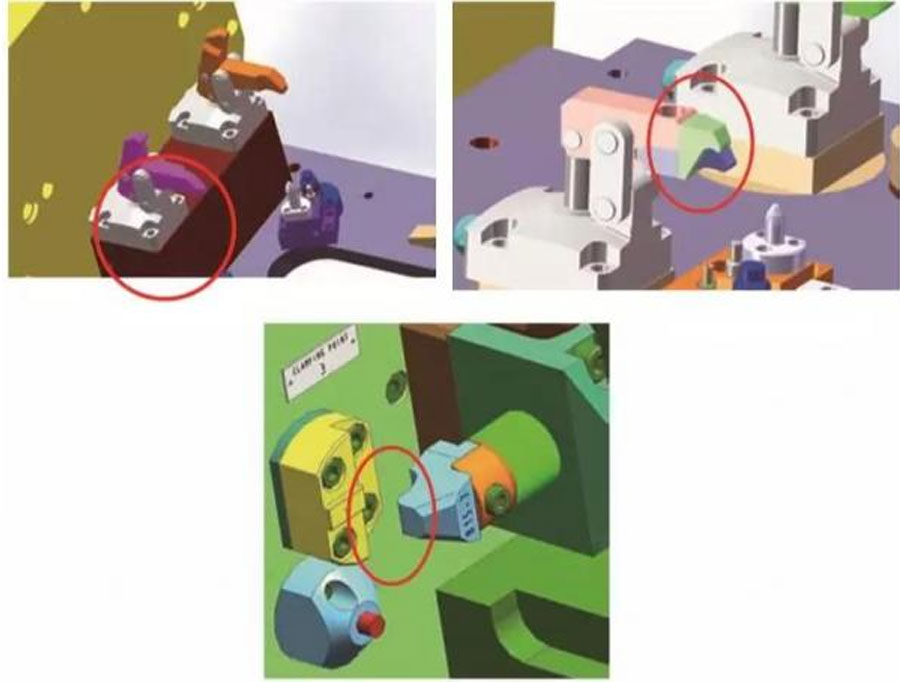
The lever-type force-increasing clamping mechanism is used to design the machining of aluminum alloy cylinder heads, which not only avoids the deformation of the cylinder heads, but also meets the machining force requirements. As shown in Figure 6, most stations adopt similar structural designs to meet the production line. The test of long-term durability. Due to the large difference in the clamping point distance, compatible clamping processes cannot be achieved. By designing a quick-change chuck structure, compatibility of different parts is achieved.
[3] Precise design of the stop structure in place
Based on low-cost design requirements, the CNC is designed for semi-automatic loading. In order to ensure that employees push and pull parts in place, the design of the induction device of the machine tool fixture is particularly important.
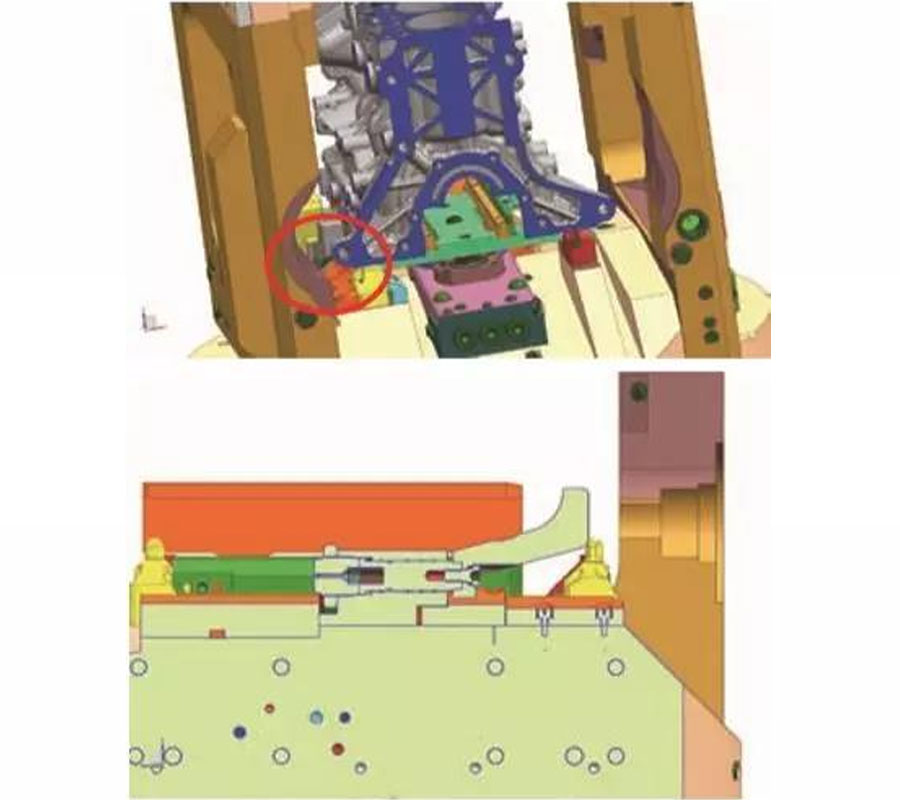
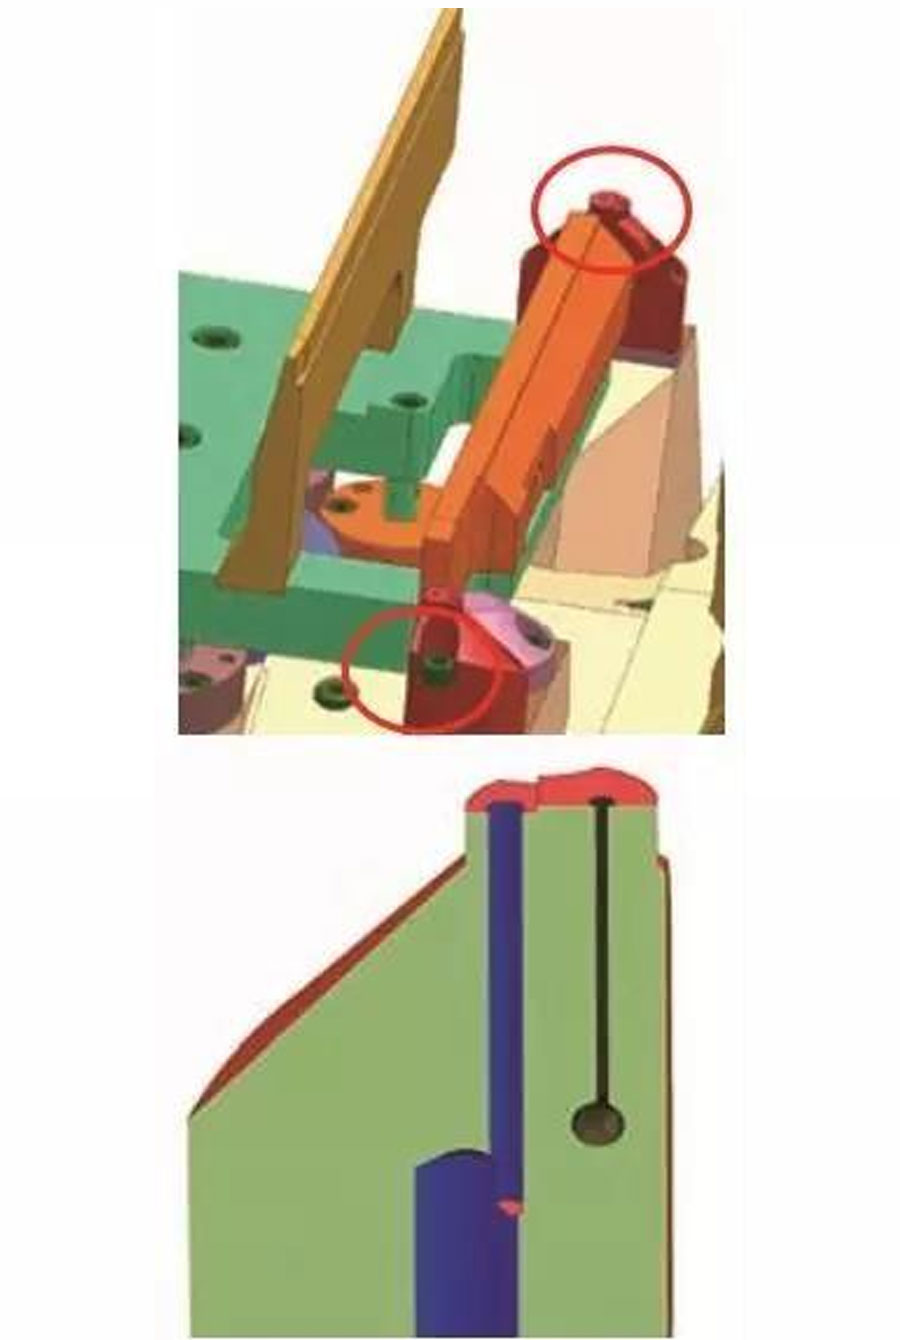
Therefore, the design is shown in Figure 7. After the workpiece is pushed into place, the internal gas path of the connecting mechanism is connected, and the pressure in the channel is changed to the set value, so that the parts are monitored in place. By writing this signal to the device’s interlock logic, the machine does not process when the part is not in place to prevent the part from falling into the machining bin.
[4] Positioning pin gas detection structure design
Based on the design structure of “one side and two pins”, as shown in FIG. 8, “one side” passes 3 or 4 positioning points; “two pins” are round pin and diamond pin positioning components.
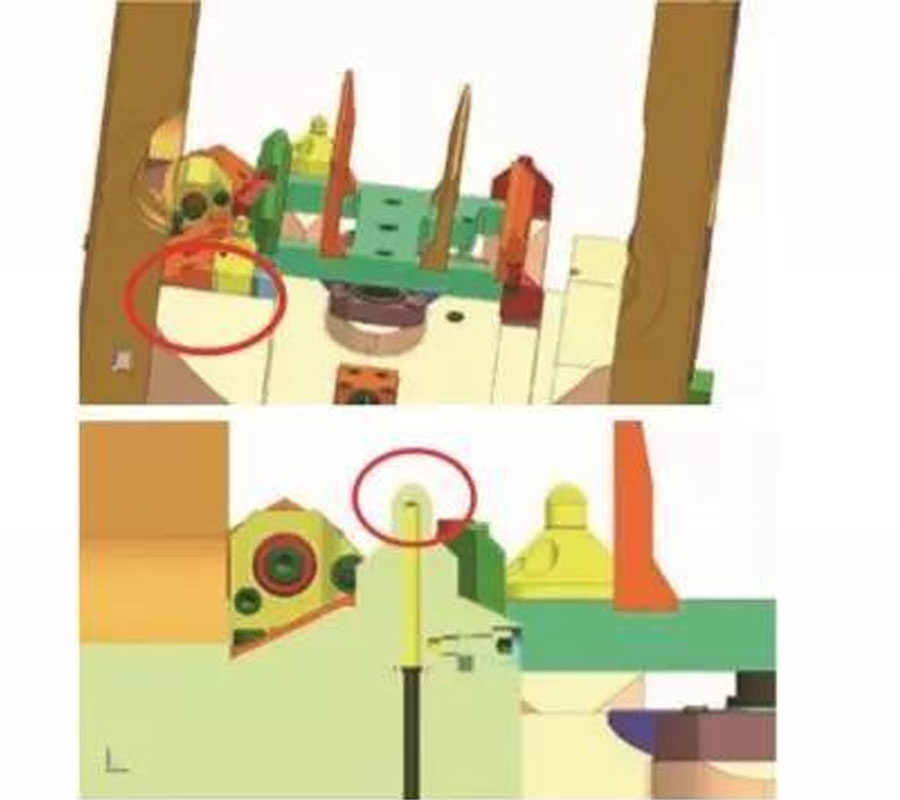
The design adopts the air pressure monitoring channel. When the force is too large, the machine tool will automatically stop and give an alarm to prevent a tool collision accident.
[5] Anchor point structure design
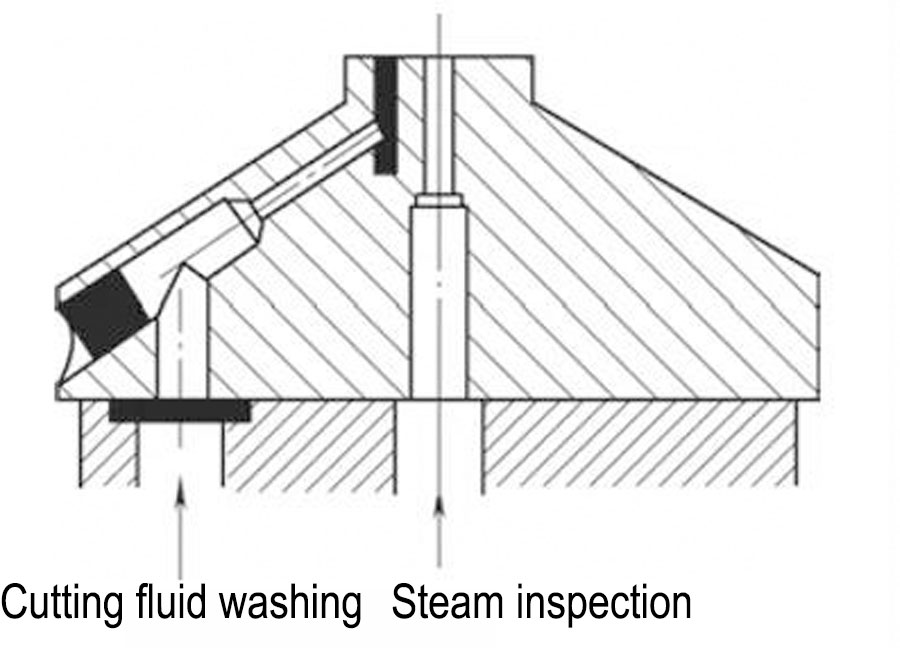
As shown in Figure 9, airtight monitoring and cutting fluid washing devices are used at each positioning point of the fixture: during the positioning process, the machining abnormality caused by iron filings on the positioning surface is prevented from being washed; during the machining, the airtight inspection monitors the whole part for displacement .
Part.3 Design of fixtures for key features
Machining is all CNC, mainly considering production flexibility and the introduction of new products in the future. However, the long-term capability of key feature machining cannot meet process requirements, such as the precision boring position of crankshaft holes.
[1] Special station fixture design
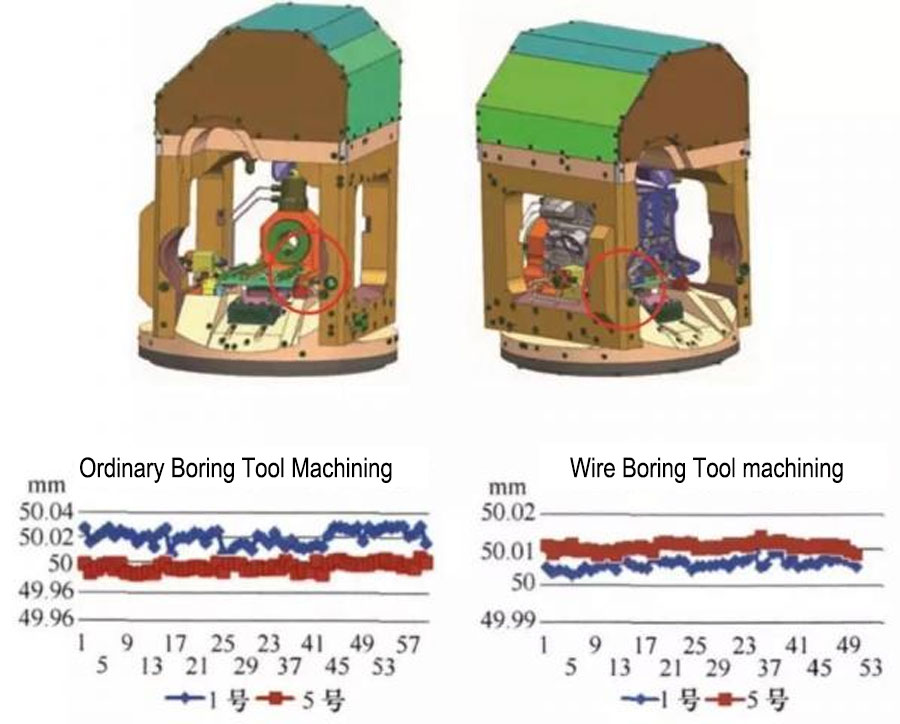
The crankshaft hole of the cylinder block is processed by a special line boring tool with special machine characteristics, which not only takes into account the flexibility of the CNC, but also guarantees the stability of the special machine. Hardness causes position variation. However, the line boring tool has very strict requirements on the center of the feed, and the positioning scheme based on the pin hole cooperation has a certain gap effect.
To eliminate the gap, as shown in Figure 10, a push cylinder is added to the side of the part. After the workpiece is seated, the part is pushed to the side by the push rod to eliminate the potential gap effect to ensure centering. By using a special-purpose wire boring cutter solution on the CNC, the center difference between the front and rear ends of the crankshaft hole was successfully improved from 0.025mm to within 0.01mm.
[2] On-line measuring device for key station tooling
On-line probes are used for the machining of key features of box-like parts, and actively intervene in the process to improve machining capabilities. Such as cylinder block thrust surface, cylinder block cylinder head combustion chamber surface and other important features machining detection, in order to ensure the machining size ability, through the probe measurement to achieve tool wear compensation. In order to avoid the influence of probe iron sticking, aluminum shavings, and probe body fluctuation, etc., a standard-size reference piece is installed on the fixture, and the measurement system is regularly calibrated and monitored to ensure the accuracy of the machining size.

Special fixtures for box parts have been successfully developed and applied in the production lines of cylinder bodies and cylinder heads. Except that some clamping and guiding components need to be changed manually, the positioning devices do not need to be changed, which can realize the in-line production of 3 major categories of products. The mixed use of A / B axes based on one side and two pins effectively shortens the production assistance time and improves the application of ergonomics, especially the application of the special machine concept to the design of CNC fixtures, which effectively improves the long-term machining capabilities of key features.
Link to this article: An High-Efficiency Special Cnc Fixture For Flexible Wire Machining Cylinder Block And Cylinder Head
Reprint Statement: If there are no special instructions, all articles on this site are original. Please indicate the source for reprinting:https://www.cncmachiningptj.com/,thanks!
 PTJ is Professional Cnc Machining Shop has 12 years experience on custom non-standard parts.ISO 9001:2015 &AS-9100 certified. 3, 4 and 5-axis rapid precision CNC machining services including milling, turning to customer specifications,Capable of metal & plastic machined parts with +/-0.005 mm tolerance.Secondary services include CNC and conventional grinding, drilling,die casting,sheet metal and stamping.Providing prototypes, full production runs, technical support and full inspection.Serves the automotive, aerospace, mold&fixture,led lighting,medical,bicycle, and consumer electronics industries. On-time delivery.Tell us a little about your project’s budget and expected delivery time. We will strategize with you to provide the most cost-effective services to help you reach your target,Welcome to Contact us ( [email protected] ) directly for your new project.
Link to this article:An High-Efficiency Special Cnc Fixture For Flexible Wire Machining Cylinder Block And Cylinder Head
Reprint Statement: If there are no special instructions, all articles on this site are original. Please indicate the source for reprinting.:ODM Wiki,thanks!^^